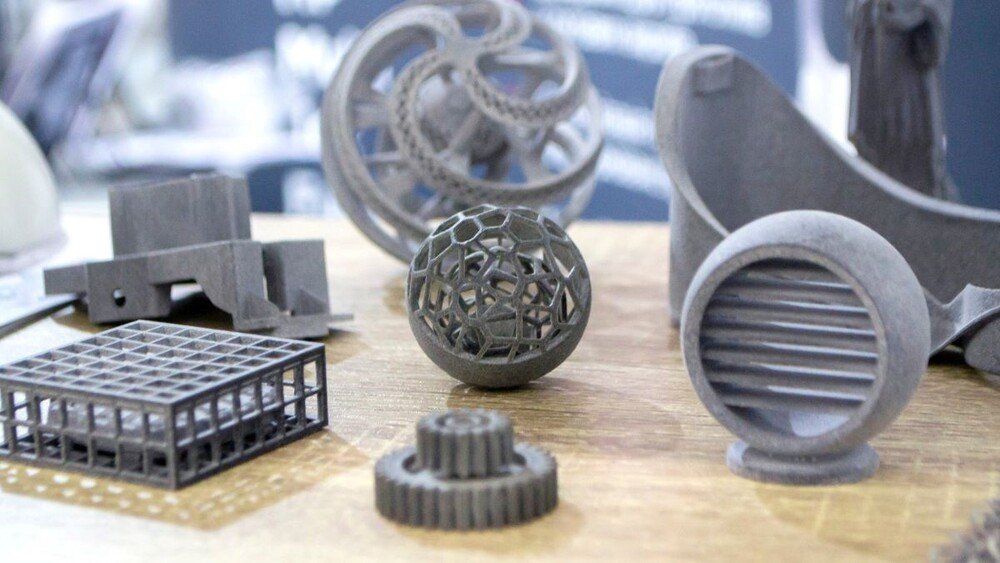
The industrial sector has transformed because of the development of metal 3D printing, which makes it feasible to produce intricate metal components with an unprecedented degree of accuracy.
Technology advancements have made metal 3D printing more accessible and inexpensive, enabling both professionals and enthusiasts to experiment with building unique components in the convenience of their own homes. We’ll look at some pointers, methods, and best practices for getting started with home metal 3D printing in this blog article.
What is Metal 3D Printing?
By depositing material layer by layer, metal 3D printing, sometimes referred to as additive manufacturing, creates three-dimensional metal objects. Contrary to conventional manufacturing methods, which frequently include removing material from a bigger item, 3D printing enables the production of intricate geometries and interior structures that are not achievable with other techniques.
Types of Metal 3D Printing at Home
Metal 3D printing comes in a variety of forms, such as powder bed fusion, direct energy deposition, and binder jetting. The best way to utilize will depend on the particular application and the intended result because each method has benefits and drawbacks of its own.
1 Binder Jetting
In this process, a binding agent is deposited on top of a coating of metal powder. The powder is fused by the binding agent to form a solid component. This method is often applied to low-volume, large-format pieces with minimal detail requirements.
2 Direct Energy Deposition
A laser or electron beam is used in the direct energy deposition or DED technique to melt metal wire or powder and deposit it on a substrate. This method is frequently used to create huge, intricate pieces with fine details as well as to repair or add material to preexisting ones.
3 Powder Bed Fusion
With the aid of a laser or electron beam, metal powder is selectively melted layer by layer during the powder bed fusion procedure to produce a solid item. Electron beam melting (EBM) and selective laser melting (SLM) are the two primary varieties of powder bed fusion. EBM employs an electron beam, whereas SLM uses a laser to melt the metal powder. Both processes result in components that are highly detailed and adaptable to a variety of applications.
Comparison Between Types of Metal 3D Printers
| Printer Type | Advantages | Disadvantages | Special Features | Relevance to use at home | Approximate Costs for Builds | Popular Products |
| Fused Filament Fabrication (FFF) | Low cost, easy to use | Limited material options, lower resolution | N/A | High | $500-$3,000 | Markforged Metal X, Desktop Metal Fiber |
| Powder Bed Fusion (PBF) | High resolution, a wide range of materials | Requires post-processing, high cost | Capable of printing complex geometries, can print multiple materials at once | Low-Medium | $10,000-$100,000+ | SLM Solutions SLM 125, EOS M 290 |
| Directed Energy Deposition (DED) | Capable of printing large parts, high deposition rates | Lower resolution, limited material options | Can add or repair material to existing parts, can print dissimilar metals | Low-Medium | $50,000-$500,000+ | Optomec LENS, DMG Mori Lasertec 65 3D |
| Binder Jetting | Low cost, fast print speeds | Limited material options, lower resolution | Capable of printing full-colour parts | High | $2,000-$20,000 | Desktop Metal Studio System, ExOne Innovent+ |
*Prices mentioned here are approximate and can vary greatly depending on the specific model and configuration.
Getting Started with Metal 3D Printing at Home
Now that we have a basic understanding of what metal 3D printing is, let’s explore how you can get started with this exciting technology from the comfort of your own home.
You will need a 3D printer that can work with metal in the first place. A 3D printer that is made expressly for printing with metal should be used because not all 3D printers can do that. Markforged Metal X and Desktop Metal Studio System are a few well-reviewed options.
You’ll also require metal powder. The most common metals used to make metal powders are steel, titanium, and aluminum. The choice of powder will be determined by the required characteristics of the finished product, such as strength, ductility, and thermal conductivity. The ultimate quality of your item will be greatly influenced by the choice of the high-quality metal powder you make, so be sure it is made for 3D printing.
The metal particles must next be fused in a sintering oven. For the individual metal particles to join together and create a solid metal item, the metal powder must be heated until it reaches its melting point (a process known as sintering). Sintering ovens come in a variety of sizes, from compact tabletop devices to substantial industrial-grade appliances.
Preparing Your Model for Printing
The next step is to get your equipment set up and get ready to have your 3D model ready for printing. To create a support system that will keep the part stable during printing, the model must be divided into layers. For this purpose, several software applications are available, including Cura and Simplify3D.

The part’s orientation should be taken into account while setting up your model for printing. The final strength and quality of the part, as well as the quantity of support material needed, will be significantly impacted by the orientation. In general, it’s preferable to position the item so that it needs little reinforcement and is uniformly thick all the way around.
Tips and Best Practices for Metal 3D Printing
Metal 3D printing can be a complex and challenging process, but there are several tips and best practices that can help you achieve high-quality results:
- Select the proper printing settings: Several factors, like layer height, print speed, and nozzle temperature, affect how well a metal 3D print turns out. It’s crucial to test out several variables to get the ideal fusion for your particular application.
- Prevent warping and cracking: Metal 3D prints are especially prone to warping and cracking, particularly if the print bed is not properly leveled or if the item is not sufficiently supported during printing. To avoid these problems, make sure to precisely level your print bed and utilize supports as necessary.
- Finishing and post-processing: You must finish your metal 3D print once it is finished printing to have the correct surface finish and attributes. Heat treatment, polishing, and other procedures are examples of this.
Conclusion
The incredible technology of metal 3D printing is a formidable force that is rapidly becoming more attainable to amateurs and experts alike, as they delve into the vast and infinite possibilities that this world-changing innovation offers. With a plethora of tips, tricks, and best practices to follow, the sky is the limit for any aspiring metal 3D printing enthusiast.
By harnessing this technology in the comfort of your own home, you can achieve high-quality, breathtaking results that will take your creativity to the next level. Whether your interests lie in the fabrication of custom parts for your projects or the unbridled exploration of fresh avenues of creativity, the alluring and captivating world of metal 3D printing promises an exciting and rewarding journey like no other.
 Join Our WhatsApp Group