नमस्कार दोस्तों आज हम एक ऐसे अद्भुत tdl फाइल के बारे में चर्चा कर रहे हैं, इस tdl फ़ाइल की मदद से आप Voucher के date को daybook में change कर सकते हैं | तो चलिए देखते हैं कि हम कैसे उपयोग कर सकते हैं इस tdl फ़ाइल का tally prime में ?
TDL code to Change Voucher Date From Daybook
[#Form: Day Book]
Add: Button: After : DSPShowGP : InputNewDate

[Button: InputNewDate]
Title: "Set Date"
Key: Ctrl+R
Action List : InputDate, ModifyDate

[Button: InputDate]
Key: Ctrl+R
Action: Alter: Rpt InputDate

[Button: ModifyDate]
Key: Ctrl+R
Action: Call : FuncEdit

[Function: FuncEdit]

;; Variable to Save MasterID
Variable : MSTID : String

;; Walking Over Current Vouchers of Day Book
100 : WALK COLLECTION : SELDayVouchers

;; Set Master ID to a Variable
120 : SET : MSTID : "ID:"+ $$String:$MasterID

;; Set Object In Edit Mode
130 : NEW OBJECT : Voucher : ##MSTID

;; Set Target to the First Ledger (PartyLedger)
140 : SET TARGET : LedgerEntries[1]

;;Modifies Value of the Methord
160 : SET VALUE : Date : #NDate

;; Back to Ledger Entry Object
170 : SET TARGET : ..

;; Back to Voucher Object
180 : SET TARGET : ..

;; Saving Object
190 : ACCEPT ALTER

200 : END WALK

[Collection: SELDayVouchers]

Data Source : Report : Current
Fetch : All Ledger Entries

[Report: Rpt InputDate]
Title : "Update Voucher Date"
Form : Input Date
Auto : Yes

[Form: Input Date]
Part : Input Date
Width: 25% Screen
Height: 8% Screen

[Part: Input Date]
Line: New Date

[Line: New Date]

Field : Long Prompt , NewDate
Local : Field: Long Prompt : Set As: "New Date"

[Field : NewDate]
Use : Short Date Field
Modifies : NDate
Border : Thin Box
Width : 15

[System : Variable]
Ndate : " "

[Variable : NDate]
Type : Date
Persistent : Yes
Step 2: अब above code को Save करने के बाद Tally Prime पर TDL File अपलोड करें ( और अगर आपको Tally Prime पर TDL File upload करने का तरीका नहीं पता है तो नीचे दिए गए Link पर Click करें जो आपको Tally Prime पर TDL File अपलोड करने के लिए Guide करेगा )
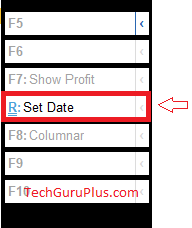
Step 3: अब आप जैसे ही Daybook open करते है आपको एक नया Option दिखेगा Right Hand Side में as “Set Date” click on the option you will get a new box where you can Update the date as shown below.

धन्यवाद दोस्तों ! अगर आपको ये आर्टिक्ल पसंद आया हैं तो इसको सोशल मीडिया पर अपने दोस्तो के साथ जरूर से शेयर कीजिए, जिससे उनको भी ये जानकारी प्राप्त हो सके।
Download Button पर Click कर के फ़ाइल डाउनलोड करें

 Join Our WhatsApp Group


Nazim Khan (Author) 📞 +91 9536250020
[MBA in Finance]
Nazim Khan is an expert in Microsoft Excel. He teaches people how to use it better. He has been doing this for more than ten years. He is running this website (TechGuruPlus.com) and a YouTube channel called "Business Excel" since 2016. He shares useful tips from his own experiences to help others improve their Excel skills and careers.


